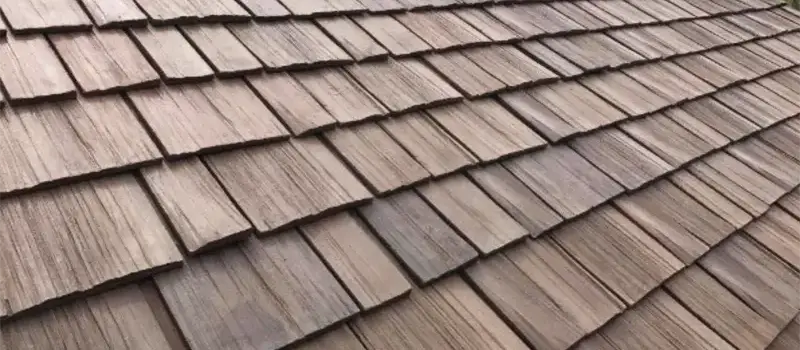
Identifying When You Need to Start Replacing Cedar Shingles
Replacing cedar shingles is one of the most rewarding home repairs you can tackle yourself — if you know the right techniques. Whether storm damage just took out a few shingles above your garage or years of Texas heat and humidity have quietly rotted a whole section of your roof, acting fast prevents small problems from becoming expensive structural ones.
Here is a quick answer to get you started:
How to Replace Cedar Shingles (Quick Steps)
- Identify the damaged shingle — look for splitting, curling, rot, or missing pieces
- Split and remove the old shingle using a hammer and chisel
- Cut hidden nails with a shingle ripper
- Source a matching replacement shingle from a local lumber yard
- Prefinish all six sides of the new shingle with solid color stain before installing
- Slide the new shingle into place, leaving a 1/4″ expansion gap
- Drive exactly two stainless steel nails, 3/4″ from each edge, just above the exposure line
- Tap the shingle up with a wood block to hide the nail heads under the course above
Cedar shingles (Thuja plicata and Thuja occidentalis) contain natural oils that resist decay, giving them a lifespan of 30 to 50 years with proper maintenance. But even the toughest cedar shingles take a beating from hail, wind, and moisture — especially in storm-prone states like Texas and Oklahoma.
This guide walks you through every step of the process, from spotting damage early to nailing the final shingle flush. If you are dealing with widespread storm damage or unsafe working heights, partnering with trusted Texas and Oklahoma roofing contractors is the safer and smarter call. For major damage that goes beyond a few shingles, visit our Roof Replacement service page to explore full system options.
I’m Cash Walker, a leadership team member at The Roof Guys with over 30 years of combined industry experience, including hundreds of cedar shingle repair and replacement projects across Greater Houston. Whether you are replacing cedar shingles on a historic home or patching storm damage after a bad season, the techniques in this guide reflect what we use in the field every day.
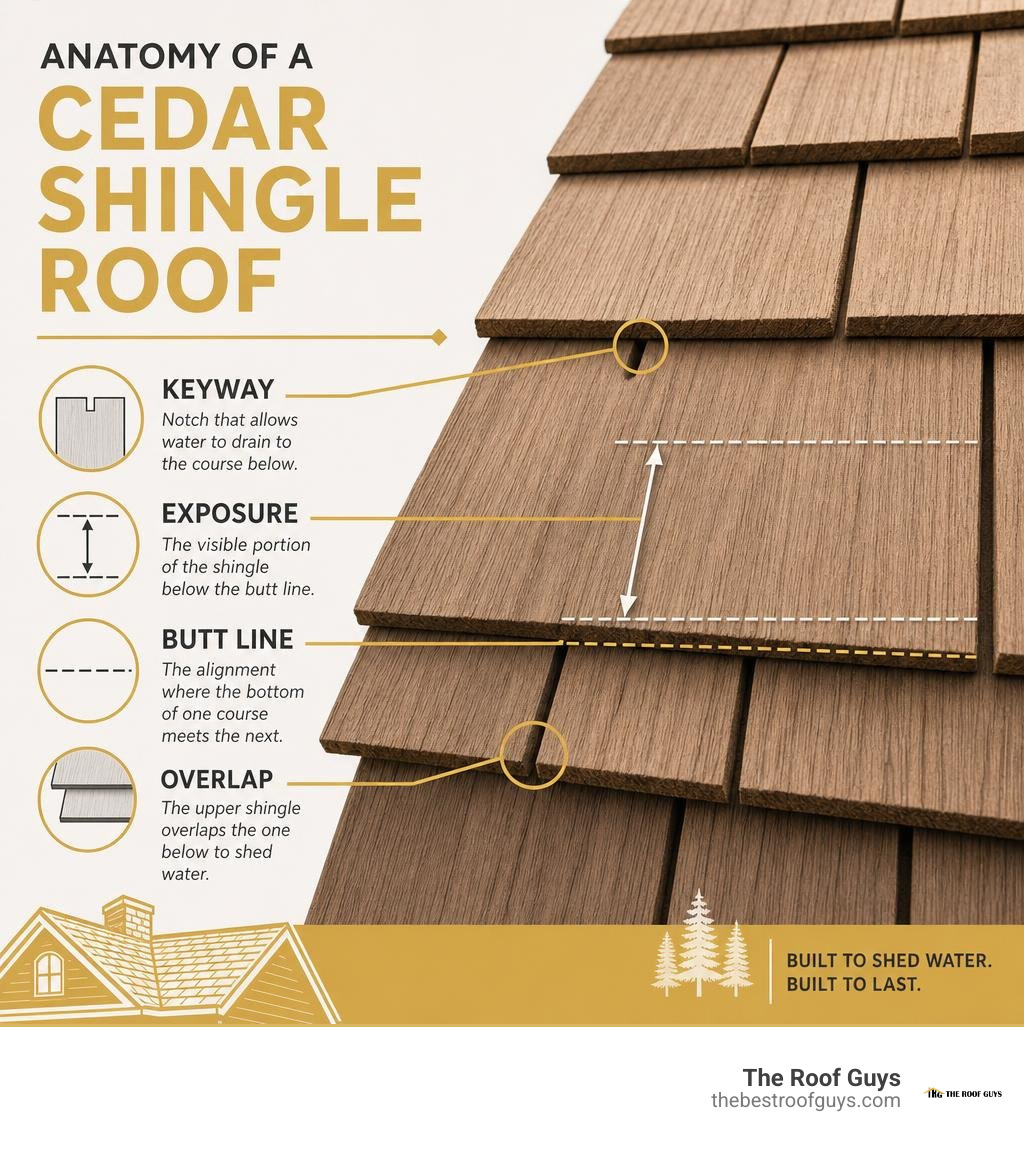
Replacing cedar shingles terms made easy:
Homeowners should replace individual cedar shingles immediately when they exhibit splitting, curling, or rot, whereas widespread cupping or moss infestation across more than 20% of the roof surface indicates a need for a complete replacement.
Catching problems early prevents water from bypassing the cedar layer and rotting your home’s plywood decking. While cedar naturally weathers to a beautiful silver-grey, physical deterioration is a clear warning sign.
To help you decide whether a quick afternoon repair will suffice or if you need to plan for a larger project, consult this quick reference table:
| Symptom | Spot Repair (DIY) | Full Replacement (Professional) |
|---|---|---|
| Hairline Splits | Acceptable if restricted to a few isolated shingles. | Sign of systemic failure if splits are present on over 25% of the roof. |
| Curling & Cupping | Replace individual warped shingles if surrounding ones are flat. | Widespread curling indicates severe UV degradation and loss of elasticity. |
| Active Rot & Soft Spots | Can be chiseled out and replaced if localized to a damp, shaded area. | Widespread rot, especially near the eaves or valleys, requires a complete tear-off. |
| Moss & Algae Growth | Clean gently and apply topical treatment if localized. | Thick moss mats that have deeply penetrated the wood fibers across the roof. |
| Storm or Hail Impact | Replace individual fractured shingles. | Severe, widespread hail bruises or missing sections after high-wind events. |
If you are unsure whether your roof is past the point of simple spot repairs, reading our detailed guide on Roof Replacement vs Roof Repair: Which Option Is Best for You will help you evaluate your options.
Essential Tools and Materials for the Job
The International Agency for Research on Cancer (IARC) classifies wood dust as a Group 1 human carcinogen, making NIOSH-approved respirators mandatory safety gear during cedar demolition.
Before scaling a ladder, gather the correct tools. Using improper tools can easily scar or crack the fragile, aged shingles surrounding your repair zone.

Ensure you have the following tools and safety gear ready:
- Shingle Ripper (Slater’s Ripper): This specialized, long flat tool slides under shingles to hook and cut hidden nails.
- Woodwork Chisel & Hammer: Used to split the damaged shingle into narrow, removable strips.
- Utility Knife or Miter Saw: For trimming replacement shingles to the exact width.
- 4d Stainless Steel Nails: The absolute gold standard. Stainless steel (specifically grades 304 or 316) resists the natural corrosive acids in cedar and will not leave ugly black rust streaks down your siding or roof.
- Block of Wood: Essential for protecting the bottom edge (butt) of the new shingle when tapping it into place.
- Safety Gear: A NIOSH-approved dust mask or respirator, safety glasses, heavy-duty work gloves, and a secure fall-protection harness if you are working on a roof.
Sourcing and Matching Your Replacement Cedar Shingles
When sourcing materials, match the wood species, cut, and texture of your existing shingles.
- Red Cedar vs. White Cedar: Western Red Cedar is highly prized for its exceptional durability and natural resistance to decay, making it perfect for the intense, humid climates of Houston, Conroe, and Pasadena. Eastern White Cedar is lighter, slightly less durable in extreme storm zones, and weathers to a distinct silvery-grey.
- Split Shakes vs. Sawn Shingles: Cedar shingles are thin, smooth, and precisely sawn on both sides for a uniform, tailored look. Cedar shakes are thicker, hand-split, and highly textured for a rustic, rugged appearance.
- Rough vs. Sanded: Check whether your existing siding or roof features the rough-sawn face or the smooth, sanded face facing outward.
For the best results, we highly recommend staining all six sides of your replacement shingle (front, back, and all four edges) with a high-quality solid color stain before installation. Prefinishing the wood seals it against moisture, preventing the uneven drying that causes shingles to cup and warp. Avoid using standard exterior paint, which forms a surface film that traps moisture inside the wood, causing premature rot.
To learn more about selecting products tailored to our regional weather patterns, check out our guide on Choosing the Right Roofing Materials for Your Home’s Climate.
Step-by-Step Guide to Replacing Damaged Shingles
To replace a damaged cedar shingle, split the damaged piece with a chisel, pull the pieces out, use a shingle ripper to cut the hidden nails, slide a color-matched replacement shingle up leaving a 1/4-inch expansion gap, and drive two nails just below the butt line of the overlapping course.
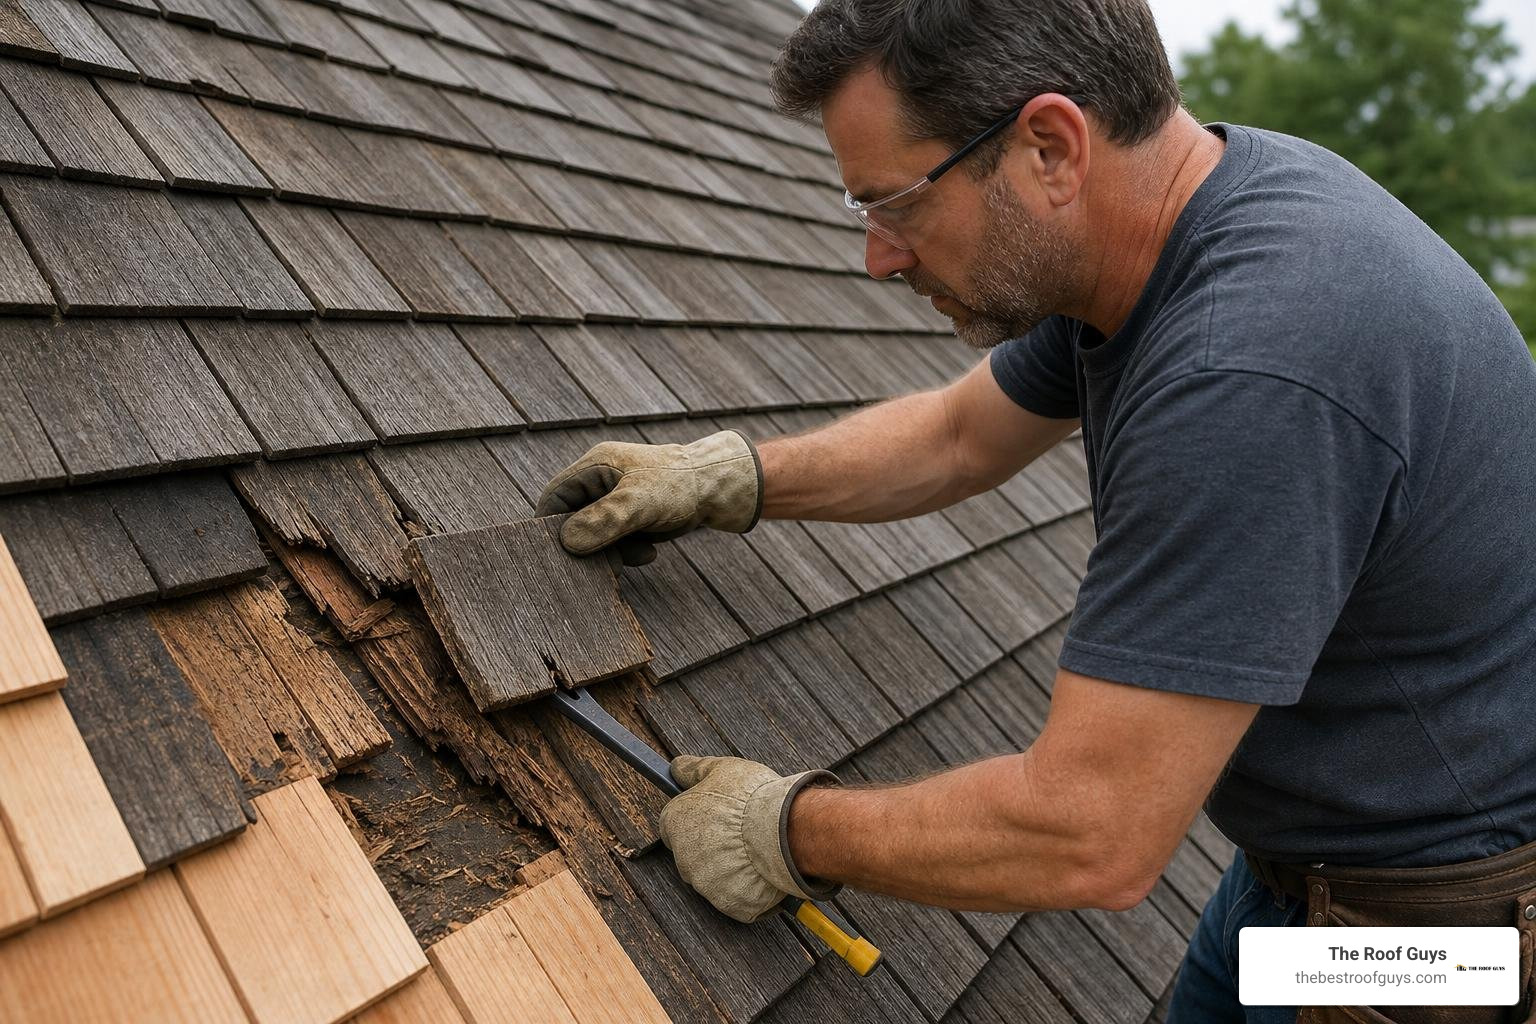
Here is how to execute this repair cleanly:
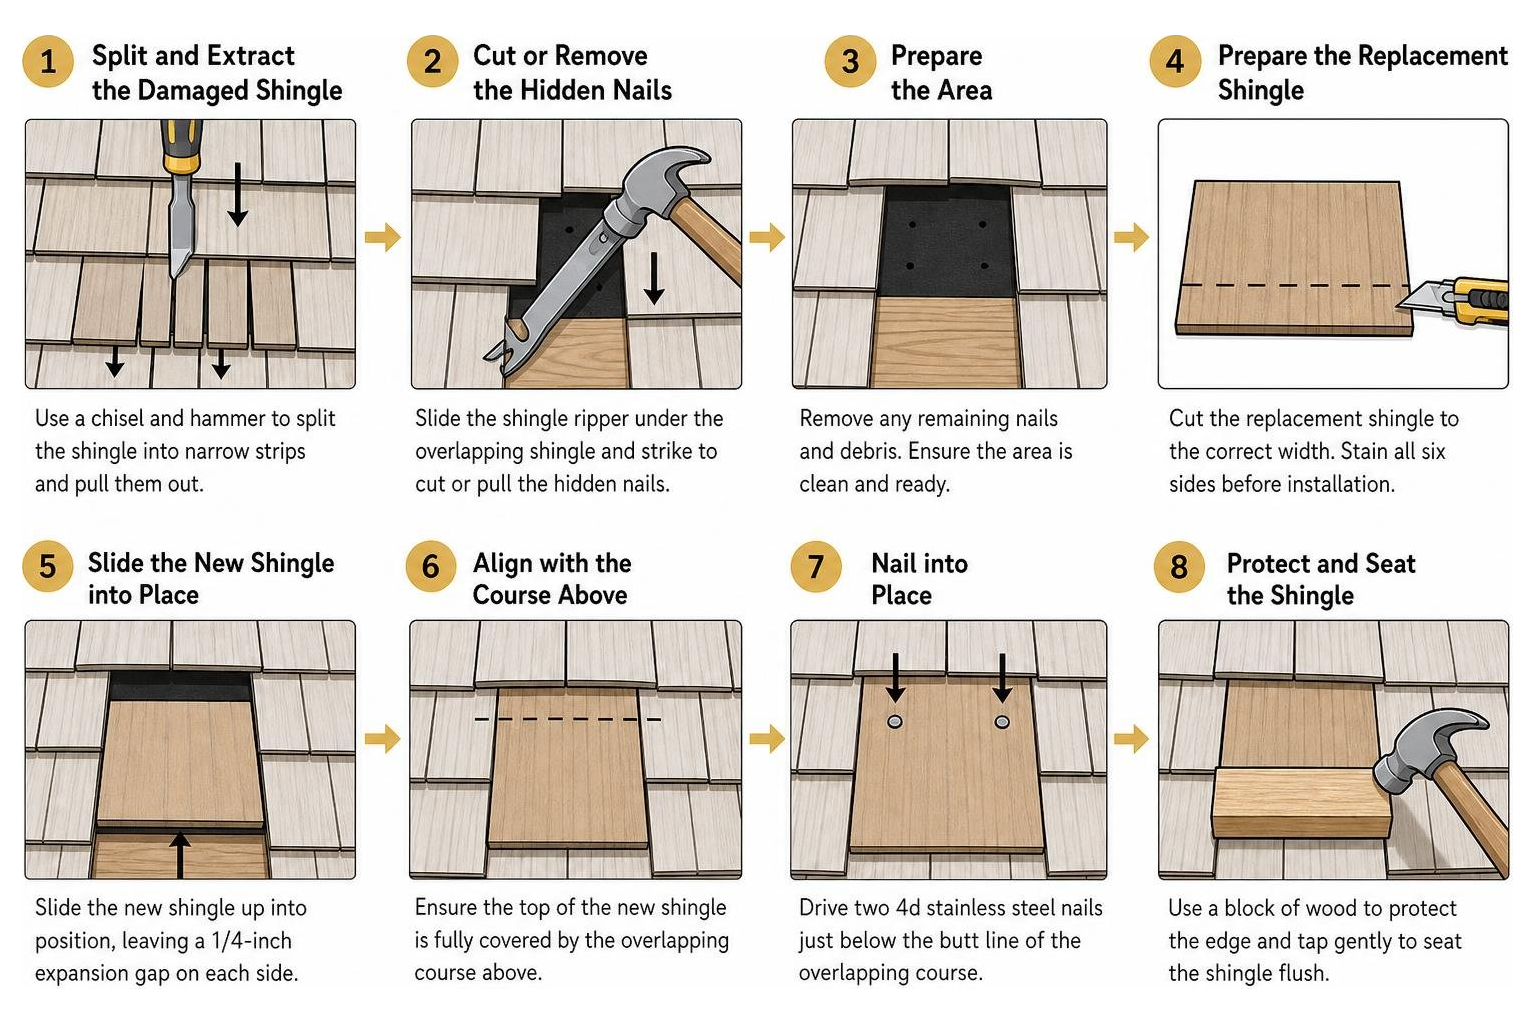
Step 1: Split and Extract the Damaged Shingle
Do not try to pry the damaged shingle out in one piece, as this will crack the overlapping shingles above it. Instead, place your woodwork chisel in the center of the damaged shingle and strike it firmly with a hammer to split the wood vertically. Make multiple vertical splits until the shingle is divided into narrow strips roughly 1 inch wide. Gently wiggle and pull these strips downward to slide them out.
Step 2: Cut or Remove the Hidden Nails
Each shingle is held in place by its own fasteners, but it is also pinned down by the nails of the course directly above it. Slide your shingle ripper up under the overlapping shingles. Locate the hidden nails, hook the tool’s notch around them, and strike the handle of the ripper downward with your hammer. This will cleanly cut or pull the old nails out.
Step 3: Manage the Remaining Nail Stems
If a nail stem cannot be pulled out, use a flat chisel and hammer to bend it flat or countersink it deep into the wood sheathing. Any protruding nail heads will puncture your new shingle or prevent it from sliding flush into place.
Step 4: Dry Fit and Trim the New Shingle
Measure the empty gap. Select a replacement shingle and trim its width using a utility knife or saw. Crucial step: You must leave a 1/4-inch to 3/8-inch expansion gap (the keyway) on either side of the new shingle. Cedar expands significantly when wet; if you wedge it in too tightly, it will buckle and split during the first heavy Texas rainstorm.
Proper Fastening Techniques for Replacing Cedar Shingles
Industry standards require exactly two fasteners per cedar shingle, positioned 3/4 inch from the side edges and 1 inch above the exposure line, to allow natural thermal expansion and contraction.
When nailing your replacement shingle, keep these three golden rules in mind:
- Maintain Staggered Side Joints: Ensure the vertical joints (keyways) of your new shingle are offset by a minimum of 1.5 inches from the joints in the courses directly above and below it. Aligning vertical seams creates a direct path for rainwater to penetrate your roof deck.
- Use Exactly Two Nails: Never drive a third nail into the center of a shingle. Restricting the wood’s natural movement will cause it to split down the middle as temperatures shift.
- The “Old School” Hidden Nail Method:
- Slide the new shingle up into the gap, stopping exactly 1/2 inch short of its final flush position.
- Drive your two stainless steel nails at an upward 45-degree angle directly into the shingle face, just below the butt line of the overlapping course above.
- Place a scrap block of wood against the bottom edge of your new shingle and tap it upward the remaining 1/2 inch with a hammer. This action slides the nail heads up under the overlapping course, completely hiding them from the elements.
For certified fastening patterns and regional code compliance, refer to the Cedar Shake & Shingle Bureau Installation Manual.
Wall Siding vs. Roof Shingle Replacement
While roof shingle replacement relies heavily on gravity and strict 3-ply overlapping to shed water, wall siding replacement allows for greater exposure limits and utilizes specialized corner boards or woven corners to handle wind-driven lateral rain.
Replacing shingles on a vertical wall vs. a sloped roof involves distinct differences:
- Exposure and Pitch: Roof shingles require a tighter exposure (the portion of the shingle left visible to the weather) to prevent water backup, whereas vertical wall siding allows for a larger exposure area.
- Corner Details: Wall siding repairs often involve working around windows, trim, and corners. When replacing shingles near corners, you must feather the new pieces with the old, alternating the overlap pattern on the left and right sides to maintain a seamless, historic look.
- The “Flashing Card” Emergency Trick: If you have a damaged wall shingle but cannot perform a full replacement immediately, slide a pre-cut strip of aluminum flashing directly behind the damaged shingle. This simple metal barrier keeps wind-driven rain from hitting the sheathing until you can execute a permanent repair.
To learn more about maintaining your home’s exterior cladding, read The Ultimate Guide to Replacing Home Siding Without Losing Your Mind.
Frequently Asked Questions About Cedar Shingle Replacement
How much does cedar shingle replacement cost?
On average, spot-replacing individual cedar shingles costs $15 to $30 per square foot, while a complete cedar shingle roof replacement ranges from $1,200 to $1,800 per square (100 sq. ft.) depending on pitch, tear-off complexity, and decking repairs.
For a standard 2,000-square-foot home, a complete cedar replacement project typically falls between $12,000 and $42,000. That a full tear-off adds $2 to $15 per square foot, and repairing hidden structural water damage on the underlying deck can add $3 to $24 per square foot. For local market data, consult the National Association of Home Builders (NAHB).
Should I switch from cedar shakes to asphalt shingles?
Switching from cedar shakes to asphalt shingles reduces upfront material costs by up to 50% and eliminates high maintenance demands, but it requires installing a solid plywood deck over existing spaced sheathing.
Cedar roofs are often installed over spaced wood lath to allow the shingles to “breathe” and dry from both sides. Asphalt shingles require a solid plywood deck. If you decide to make the switch, you will need to pay for solid decking installation. However, asphalt eliminates the need for recurring preservative treatments. For more detail on making this decision, read our guide on Should You Switch From Cedar Shake to Asphalt Shingles? or review the performance standards outlined by the Asphalt Roofing Manufacturers Association (ARMA).
Can I use a nail gun to install replacement shingles?
Yes, you can use a siding nailer with stainless steel ring-shank nails, but hand-driving remains the industry gold standard because it prevents over-driving, which crushes the delicate wood fibers and voids manufacturer warranties.
If you choose to use a nail gun, dial the air pressure back significantly. Standard roofing nailers are set too high for cedar and will blow the nail straight through the soft wood, rendering the fastener useless. Always use nails; staples should never be used on cedar roofs.
When to Hire a Professional Roofing Contractor
While swapping out a few damaged shingles on a low-slope garage roof is an achievable weekend DIY project, many scenarios require professional expertise:
- Extreme Heights and Steep Slopes: Working on two- or three-story homes requires professional fall-arrest systems and staging equipment.
- Widespread Wood Rot: If you remove a shingle and find soft, black, or crumbling plywood underneath, the structural deck is compromised.
- Complex Roof Geometry: Replacing shingles around chimneys, dormers, and deep valleys requires precise flashing integration to prevent catastrophic leaks.
The Roof Guys Advantage
At The Roof Guys, we are a family-owned contractor specializing in residential and commercial roofing, siding, and storm response across Texas and Oklahoma. Whether you are dealing with severe hail damage in Houston, Conroe, Pasadena, The Woodlands, Spring, Katy, or Huntsville, or need expert repairs in Tulsa and Oklahoma City, we have you covered.
Our team provides an ultra-fast turnaround, an industry-leading 10-year workmanship warranty, and expert insurance claim assistance after major storms.
Do not let a small leak turn into a major headache. Contact our friendly team today at 541-868-8390 to schedule a professional, honest roof assessment.