Find the Source Before You Repair the Stain
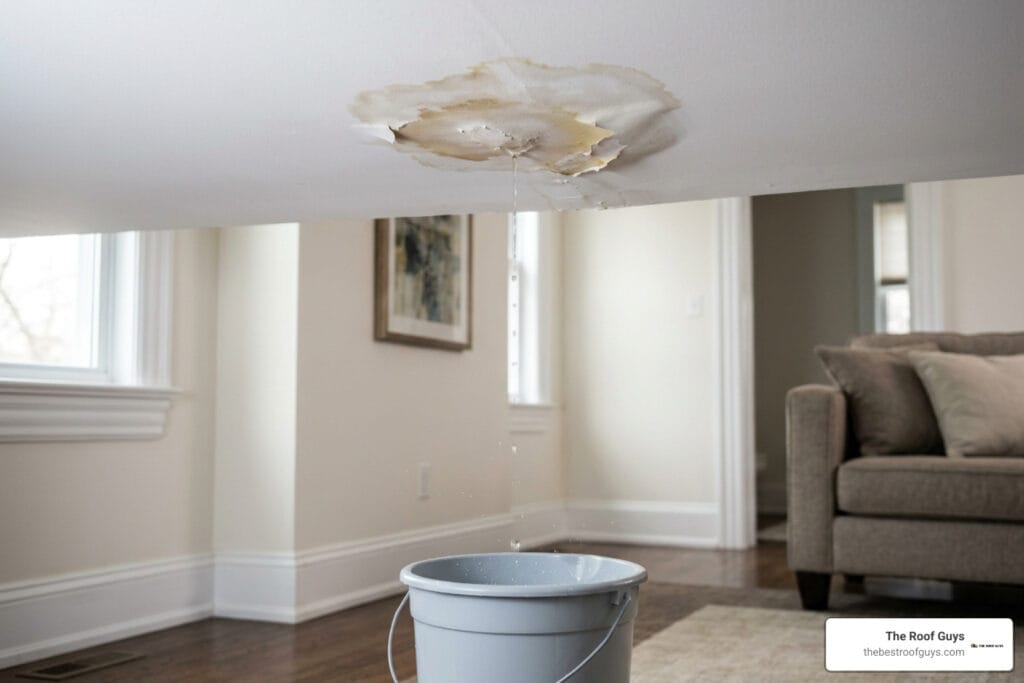
To learn how to find a ceiling leak, first contain any active drip, then track when the stain gets worse. Leaks that appear during rain usually point to the roof, flashing, vents, valleys, or overflowing gutters. Drips that happen in dry weather or after someone showers, flushes, or runs a sink usually point to plumbing, drain seals, or an HVAC condensate problem.
- Photograph the stain and note the weather or fixture use before it appeared.
- Check the attic directly above and beside the stain for wet insulation, rafters, or roof decking.
- Use a moisture meter, flashlight, or small borescope hole to follow the dampness toward its highest reading.
- Test one suspect at a time: run a bathroom fixture, or use a controlled hose test on the roof from low to high.
The stain is often the end of the water’s path, not the entry point. Water can travel 10 to 20 feet along roof decking, rafters, joists, pipes, or the back of drywall before it finds a low spot and becomes visible. If the ceiling is bulging, sagging, or near a light fixture, shut off power to that area, move valuables, catch the water, and contact emergency roof leak help right away.
I am Cash Walker, part of the leadership team at The Roof Guys in Greater Houston, where our team brings more than 30 years of roofing experience to storm damage and leak investigations. In this guide, I will show you how to find a ceiling leak safely before a small water spot turns into damaged insulation, drywall, or roof decking.

Immediate Triage: What to Do When Water Is Dripping
When water is actively dripping through your ceiling, immediate containment prevents catastrophic drywall failure and structural rot. Saturated drywall loses up to 90% of its structural strength, and trapped water creates an overhead pool that will eventually tear through the paper backing, dumping gallons of water into your living space at once.
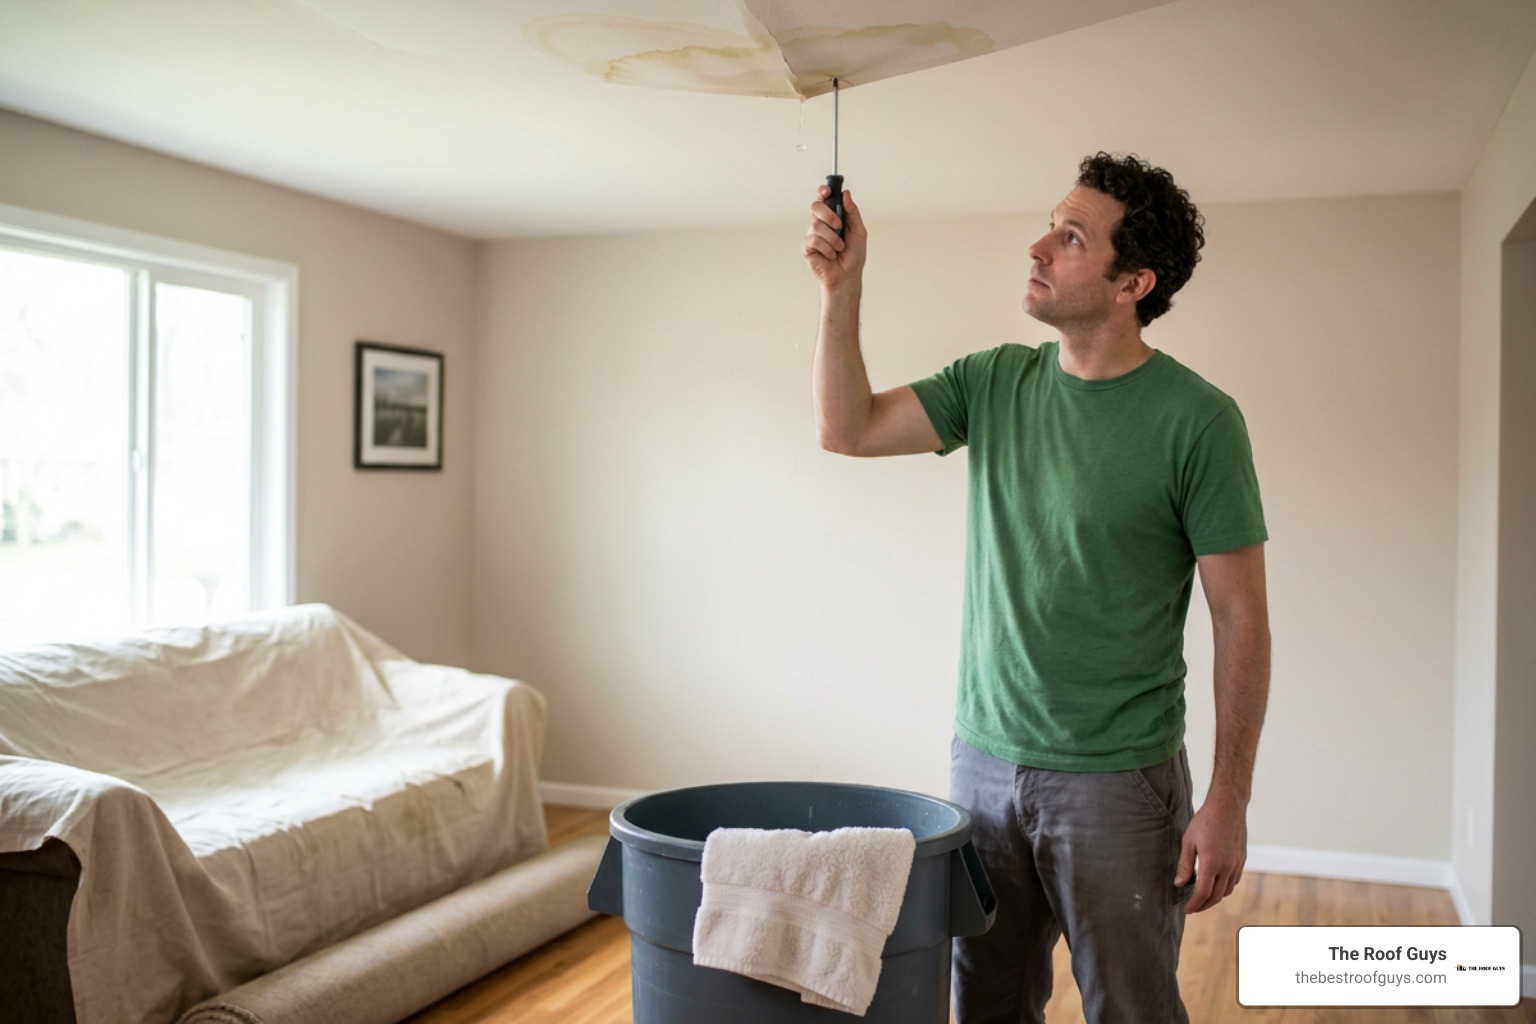
Execute these four steps immediately upon discovering an active ceiling leak:
- Clear the Impact Zone: Move furniture, electronics, and rugs away from the area beneath the leak. Place heavy plastic sheeting over immovable items.
- Set Up Containment: Position a bucket or large plastic tote directly under the drip point. Place an old towel inside the bucket to eliminate echoing splash noises.
- Relieve Water Weight: If the ceiling drywall is visibly sagging, soft, or blistered with water-filled paint bubbles, perform a controlled puncture. Stand outside the sag zone and push the tip of a screwdriver, nail, or awl directly into the center of the lowest point of the bulge. This releases the accumulated water directly into your bucket in a steady stream, preventing a sudden, wide-scale ceiling collapse.
- Isolate Electrical Fixtures: If the water is leaking through or within 2 feet of a light fixture, ceiling fan, or junction box, shut off the breaker controlling that circuit at your main electrical panel immediately. Do not flip light switches in the wet room.
If severe weather is driving water into your home, securing emergency roofing services for same-day tarping stops interior deterioration before mold colonization begins within 24 to 48 hours.
Roof vs. Plumbing: How to Find a Ceiling Leak Source Quickly
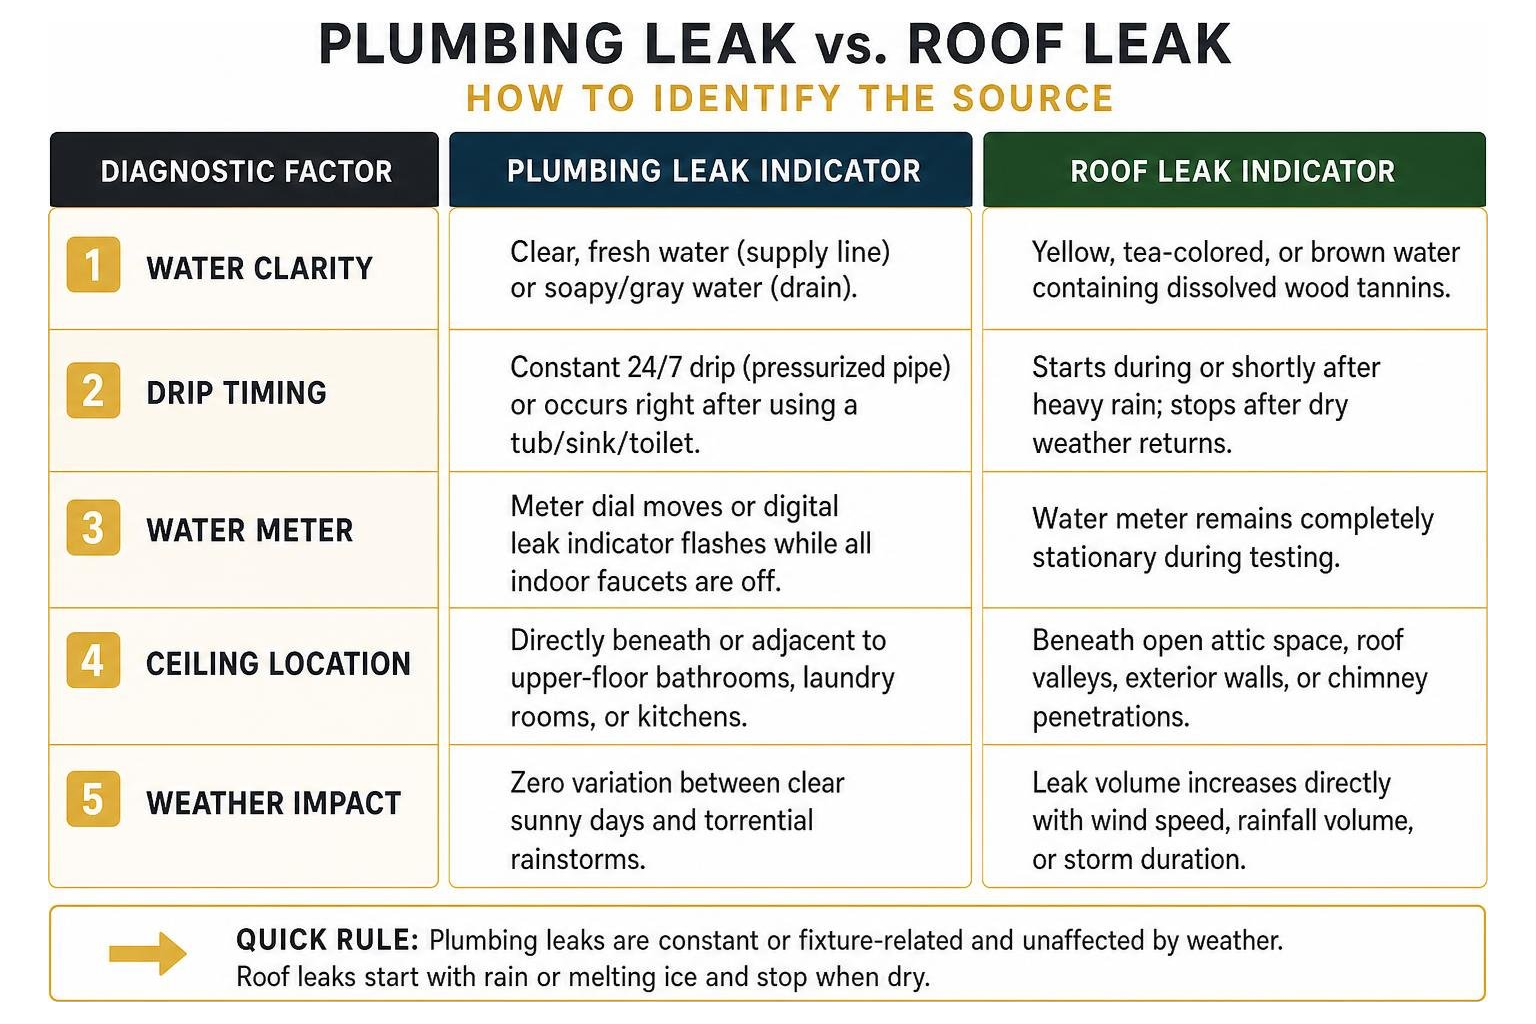
The fastest way to determine whether a ceiling leak originates from the roof or an interior plumbing pipe is by analyzing the timing of the drip and the water clarity.
Plumbing leaks create continuous or fixture-correlated drips regardless of outdoor weather. Roof leaks correlate strictly with rainstorms, wind-driven moisture, or melting winter ice.
| Diagnostic Factor | Plumbing Leak Indicator | Roof Leak Indicator |
|---|---|---|
| Water Clarity | Clear, fresh water (supply line) or soapy/gray water (drain). | Yellow, tea-colored, or brown water containing dissolved wood tannins. |
| Drip Timing | Constant 24/7 drip (pressurized pipe) or occurs right after using a tub/sink/toilet. | Starts during or shortly after heavy rain; stops after dry weather returns. |
| Water Meter | Meter dial moves or digital leak indicator flashes while all indoor faucets are off. | Water meter remains completely stationary during testing. |
| Ceiling Location | Directly beneath or adjacent to upper-floor bathrooms, laundry rooms, or kitchens. | Beneath open attic space, roof valleys, exterior walls, or chimney penetrations. |
| Weather Impact | Zero variation between clear sunny days and torrential rainstorms. | Leak volume increases directly with wind speed, rainfall volume, or storm duration. |
To rule out municipal line ruptures or hidden pressurized plumbing leaks inside wall cavities, check your main water meter. You can consult local utility guidance on checking water meters for municipal line leaks to confirm whether constant flow is registering on your account. If the leak indicator spinner moves while all indoor valves are shut off, you are dealing with a pressurized plumbing line.
Analyzing Water Color, Timing, and Flow Patterns
Water color provides immediate physical evidence of the path water traveled:
- Tea-Colored or Brown Water: When rainwater penetrates an asphalt shingle roof, it washes over oriented strand board (OSB) or plywood roof decking, wood rafters, and ceiling joists. This process leaches natural wood tannins and atmospheric dust, staining the water a distinct tea-like yellow or dark brown before it soaks through ceiling plasterboard.
- Crystal Clear Water: Pressurized copper, PEX, or CPVC potable supply lines release clean, treated tap water that leaves faint yellow rings only after repeatedly dissolving gypsum drywall binders.
- Milky or Gray Water: Bathtub, shower, and washing machine drains release wastewater containing detergents, body oils, and soap scum, producing a stale odor alongside discoloration.
Timing also reveals entry mechanics. Heavy rain creates elevated hydrostatic pressure across the roof surface, forcing water through small shingle tears or failed sealants. If a ceiling leak only appears during torrential downpours with driving wind, the failure point is typically perimeter flashing or vertical siding-to-roof transitions.
Testing Interior Plumbing Fixtures and Supply Lines
Over 80% of intermittent ceiling leaks occurring in dry weather stem from failed bathroom drain seals, cracked shower pans, or worn wax rings beneath second-floor toilets.
Isolate plumbing components systematically using this sequence:
- The Toilet Wax Ring Test: Flush the second-floor toilet three consecutive times while a helper observes the ceiling below. If water drips within 2 to 5 minutes, the wax seal or closet flange is fractured.
- The Shower Pan Standing Water Test: Place an expanding rubber test plug or mechanical drain stopper over the shower drain. Fill the shower base with 2 inches of cold water using a bucket (without running the showerhead valve). Let the water sit for 30 minutes. If the ceiling stains darken or drip, the shower pan membrane or drain flange seal has failed.
- The Splash and Grout Test: If standing water produces no leak, turn on the showerhead and spray water directly onto the tiled walls, faucet escutcheon plates, and glass enclosure seams for 10 minutes. This confirms whether deteriorated grout lines or leaky supply risers inside the wall cavity are responsible.
- Supply Line Isolation: Inspect the shut-off valves and braided lines under sinks. For detailed step-by-step instructions on isolating fixture lines, reference this guide covering 5 common household leak points and diagnostic steps.
Advanced Diagnostic Methods for Pinpointing Hidden Leaks
Water obeys gravity, surface tension, and capillary action. When rainwater breaches an exterior roof covering, it rarely drops straight down onto the drywall below. Instead, it tracks along the underside of roof sheathing, flows down the edge of sloped rafters, runs horizontally across ceiling joists, and follows electrical wiring or copper plumbing runs.
Water can travel 10, 15, or even 20 feet horizontally from its roof entry point before accumulating at a low drywall fastener or ceiling seam to form a visible stain.
Non-destructive diagnostic tools allow technicians to trace these moisture pathways without demolishing healthy drywall. Professional non-destructive methods resolve over 90% of ceiling leak cases without opening the ceiling envelope.
Using Moisture Meters and Thermal Imaging: How to Find a Ceiling Leak Accurately
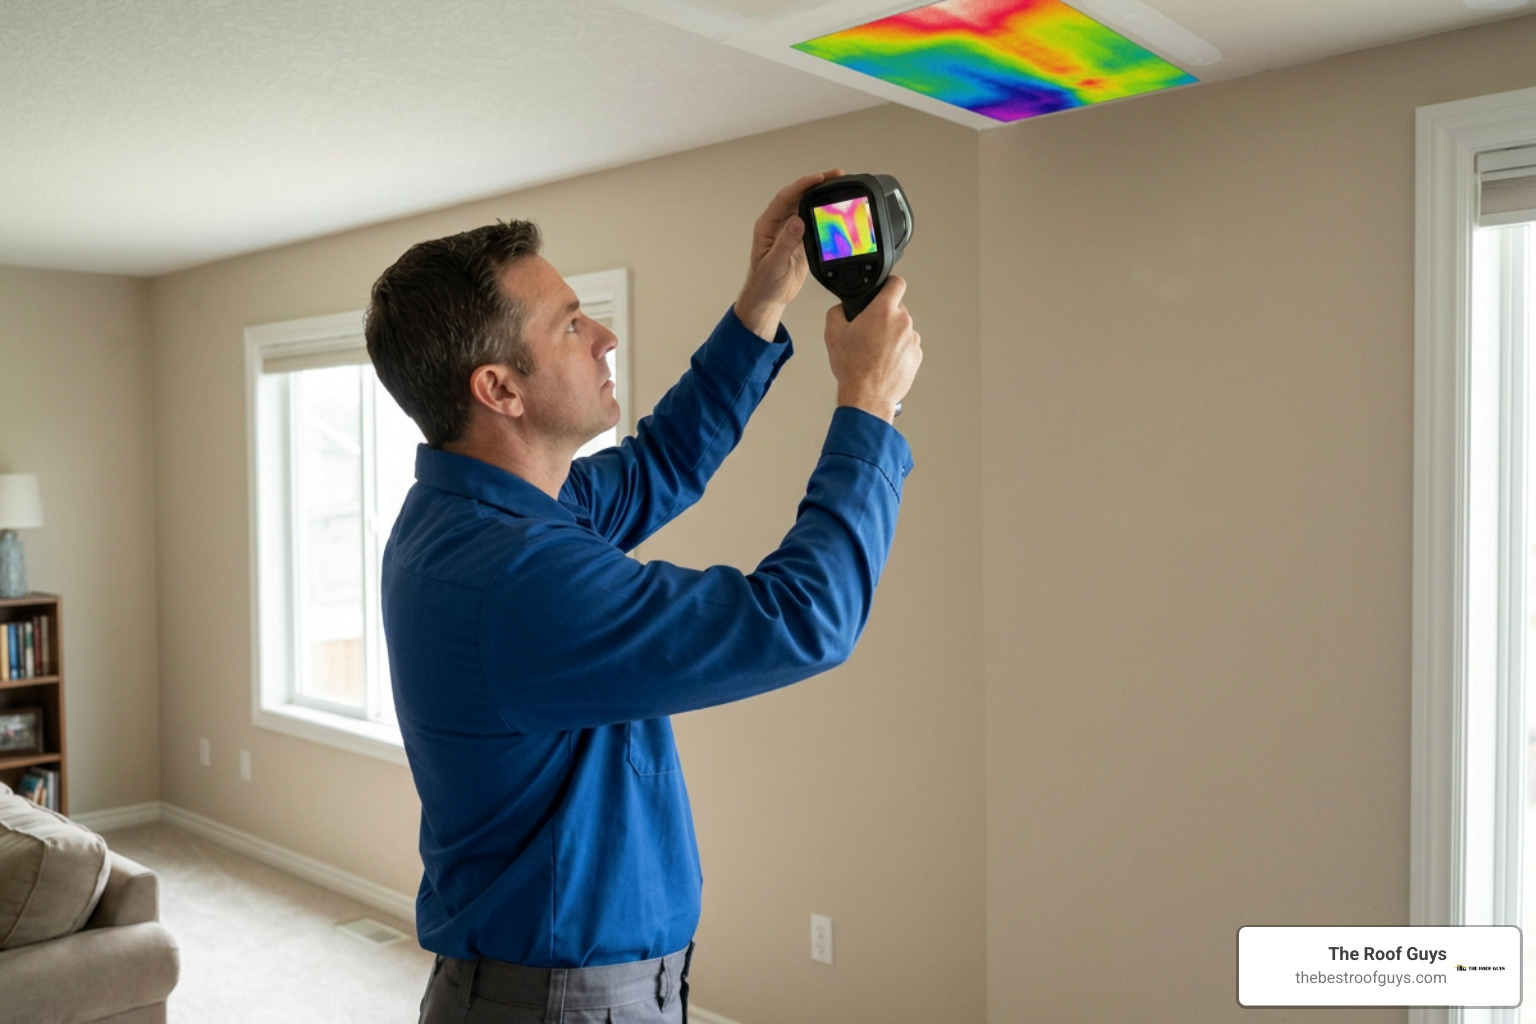
Infrared thermal imaging cameras detect surface temperature differentials created by evaporative cooling. Because damp drywall evaporates moisture continuously into indoor air, wet areas register between 1°C and 3°C cooler than adjacent dry building materials. Scanning a ceiling with a thermal camera highlights the exact shape and trail of water traveling behind the plasterboard, showing a clear thermal footprint pointing back to the highest moisture concentration.
Once thermal imaging isolates the wet zone, verify the exact boundaries using a pinless or pin-type moisture meter:
- Dry Drywall Benchmark: 5% to 12% Wood Moisture Equivalent (WME).
- Elevated Moisture / At Risk: 13% to 17% WME.
- Active Saturation / Structural Threat: 18% to 100% WME.
Map your readings on a simple grid pattern spaced 12 inches apart across the ceiling plane. The point displaying the highest WME percentage represents the true entry point where water drops from framing onto the ceiling. To visually inspect the joist cavity above that exact location, drill a single 1/4-inch inspection hole and insert an articulated borescope camera equipped with an LED light, eliminating the need for large exploratory drywall cuts.
Attic Inspection: How to Find a Ceiling Leak Origin Along Rafters
An attic inspection is the most direct physical method to trace a ceiling leak backward to its roof entry point. Active leaks rot wood roof decking within 60 to 120 days of sustained moisture exposure, making prompt attic evaluation critical.
Follow these safety and diagnostic steps in the attic space:
- Attic Safety: Wear an N95 respirator, safety glasses, and durable work gloves. Step only on solid wood ceiling joists or temporary plywood walkways. Never step on exposed drywall, which will not support human weight.
- Locate the Interior Drip Zone: Measure the distance from the room’s nearest exterior wall to the ceiling stain below. Replicate those measurements inside the attic to locate the exact joist bay.
- Inspect Insulation and Framing: Gently push aside fiberglass batts or blown-in cellulose. Saturated insulation mats together and develops a distinct sour smell.
- Follow the Moisture Trail Upward: Shine a 1,000+ lumen flashlight along the rafters directly above the wet insulation. Look for darkened wood grain, white or black fungal growth, rust stains running down framing nails, or water streaks on the underside of the plywood decking.
- The Sunny-Day Test: Turn off all attic work lights and work lights on a bright, sunny afternoon. Allow your eyes 3 to 5 minutes to adjust to the darkness. Look toward the roof deck, valleys, and eaves for tiny pinholes of daylight. Any daylight penetration through the deck indicates an unsealed path where pressurized rainwater enters during storms.
For challenging attic structures, scheduling comprehensive roof inspections provides access to specialized structural evaluation gear and certified moisture-mapping protocols.
Low-to-High Water Hose and Dye Testing Procedures
When visual attic inspections fail to locate the defect on a dry day, a controlled water hose test isolates the breach. A methodical hose test takes 30 to 90 minutes and requires two people: one technician on the roof operating the hose and one observer in the attic equipped with a radio and high-powered light.
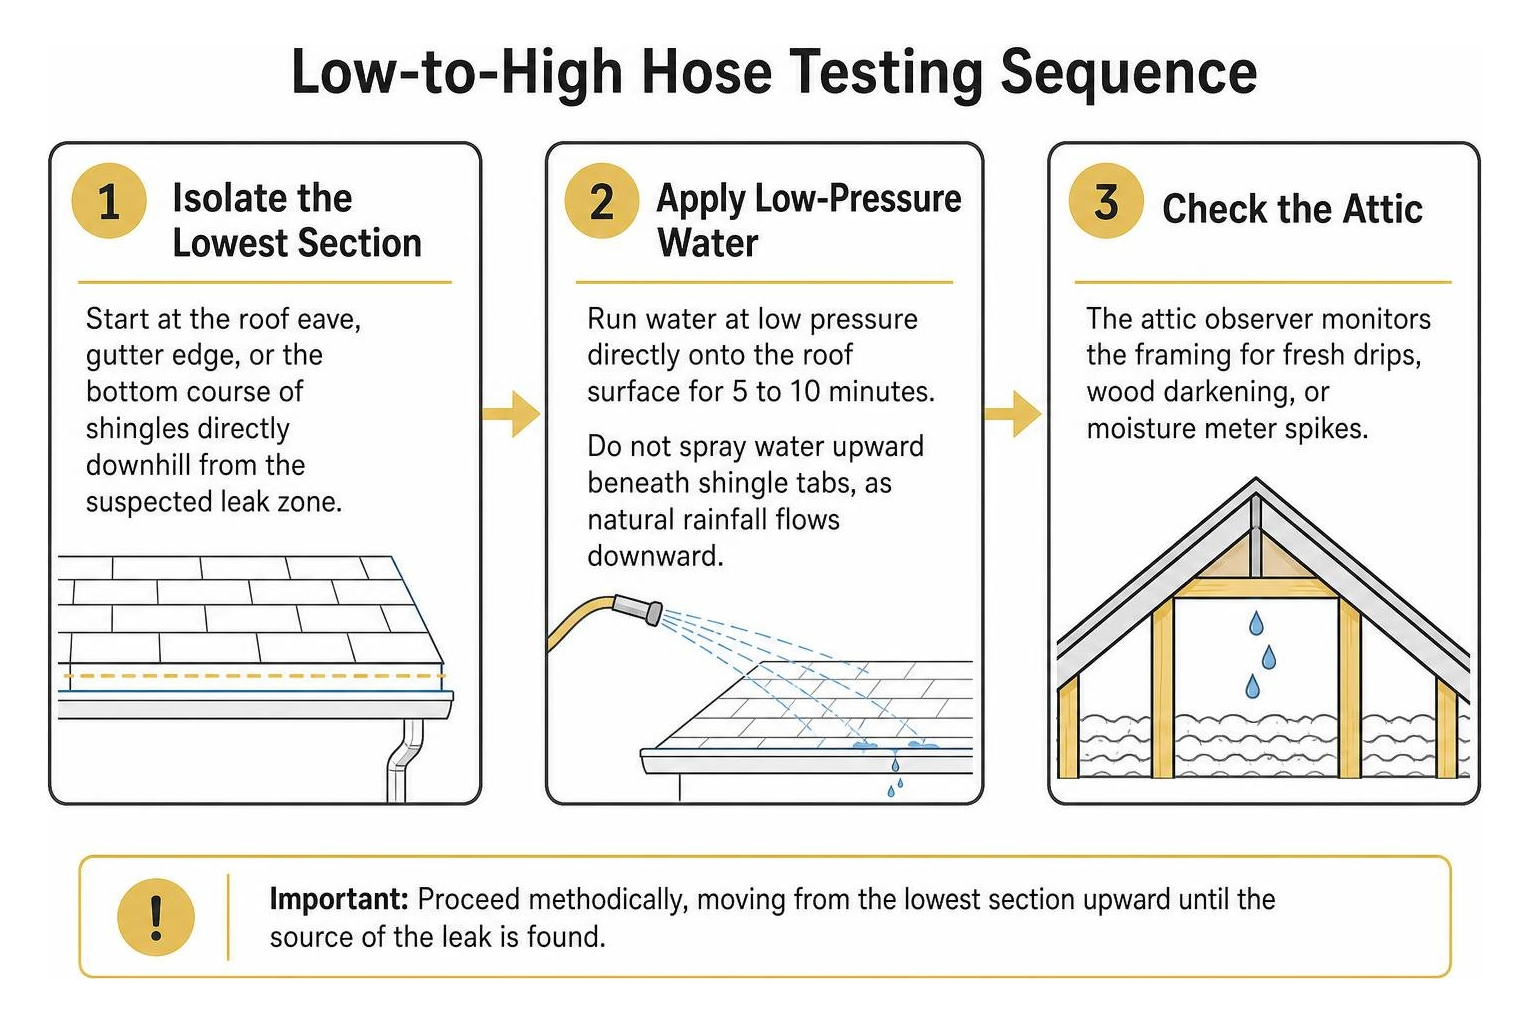
Follow this strict low-to-high testing protocol:
- Isolate the Lowest Section: Start at the roof eave, gutter edge, or the bottom course of shingles directly downhill from the suspected leak zone.
- Apply Low-Pressure Water: Run water at low pressure directly onto the roof surface for 5 to 10 minutes. Do not spray water upward beneath shingle tabs, as natural rainfall flows downward.
- Check the Attic: The attic observer monitors the framing for fresh drips, wood darkening, or moisture meter spikes.
- Move Upward Systematically: If no water appears after 10 minutes, move the hose upward by 2 to 3 feet or isolate the next specific roof component (such as a step flashing seam or a valley). Soak that isolated section for another 10 minutes.
- Flood Plumbing Penetrations: Wrap a rag around the pipe vent collar to isolate the rubber boot from the surrounding shingles. Run water directly onto the boot. If water appears below, the rubber boot has dry-rotted.
- Fluorescein Dye Tracing: For complex flat roofs, concrete slab decks, or split-level framing interfaces, mix water-soluble fluorescein dye powder into a 5-gallon water bucket. Pour the colored solution over the suspected entry seam. Fluorescein glows vibrant neon green under an ultraviolet (UV) blacklight, allowing you to trace the exact water track through attic rafters even after the water dries down to a thin residue.
Common Structural Entry Points and Roof Vulnerabilities
Roof leaks are rarely caused by a random hole in the middle of a shingle field. Instead, water intrusion clusters around penetrations, structural seams, and transitions where materials intersect.

When strong storms impact building envelopes, relying on dedicated storm damage services ensures every compromised flashing joint and wind-lifted shingle is identified before hidden rot spreads across structural decking.
Flashing Failures, Vent Boots, and Valleys
Flashing failures account for approximately 40% of all residential roof leaks, valley leaks account for 15%, and ice dams represent 10%. Missing or damaged shingles represent 10%, while nail pops contribute another 10%.
- Step Flashing and Counter-Flashing: Step flashing weaves L-shaped sheet metal between each shingle course along vertical wall intersections, sealed with counter-flashing embedded in masonry joints. Over time, thermal expansion breaks mortar seals, and caulking cracks, allowing wind-driven rain to run directly behind the exterior siding into wall and ceiling cavities.
- Plumbing Vent Boots: Standard neoprene rubber pipe boots degrade under ultraviolet radiation within 7 to 10 years, cracking around the plumbing stack. Rainwater runs straight down the outside of the PVC pipe, dripping through ceiling drywall near upstairs bathrooms.
- Roof Valleys: Valleys channel thousands of gallons of rainwater from intersecting roof planes. Metal valley corrosion, misdriven fasteners located within 6 inches of the valley centerline, or cracked modified bitumen membranes cause substantial leaks during heavy downpours.
- Nail Pops: Thermal cycling pushes improperly driven roofing nails upward through the shingle surface. Rainwater wicks down the shank of the lifted nail, creating a slow, steady drip onto the roof decking.
Resolving these penetration failures requires professional roof repair to reset flashing profiles, replace rotted decking substrates, and restore shingle overlap integrity.
Gutters, Ice Dams, and Condensation Confusion
External drainage problems and internal humidity frequently masquerade as active roof leaks:
- Clogged Gutters and Fascia Rot: When gutters fill with leaves, pine needles, and debris, trapped water pools over the gutter back-lip. Water wicks behind the aluminum fascia board, rotting the roof overhang rafter tails and flowing backward into the exterior soffit and ceiling edge. Gutters must maintain a minimum downward slope of 1/4-inch per 10 feet toward downspouts to prevent backflow.
- Ice Damming: In freezing winter conditions, heat escaping from under-insulated attics melts snow on the upper roof. The meltwater runs down to the cold eave and refreezes, forming an ice dam. Liquid water pools behind the ice barrier and backs up beneath shingles, penetrating standard felt underlayment and dripping down exterior ceiling perimeters.
- HVAC Duct Condensation: In hot, humid climates, uninsulated or poorly sealed air conditioning ductwork running through an unconditioned 130°F attic reaches its dew point. Condensation beads on the exterior of sheet metal or flexible ducts and drips onto the ceiling below. This sweating creates circular water stains in mid-summer without any outdoor rainfall.
Implementing seasonal roof maintenance clears gutter obstructions and optimizes attic ventilation, keeping roof decking dry year-round.
Permanent Repair and Ceiling Restoration Protocol
Finding and stopping the water leak is step one; restoring structural framing and drywall completes the job. Never close or paint over a ceiling stain until you confirm the substrate is completely dry.
Active leaks left unattended rot roof decking within 60 to 120 days, and sealing wet materials traps active fungal spores inside your ceiling cavity.
Fixing the Penetration and Decking Damage
Once non-destructive testing pinpoints the exterior breach, repair the roof structure using this sequence:
- Remove Compromised Materials: Strip back shingles around the penetration to expose a 2-foot perimeter of bare roof decking.
- Inspect Wood Decking: Check the plywood or OSB sheathing for delamination, soft spots, and rot. If the wood flexes under moderate thumb pressure, cut out the damaged section back to the center of the nearest framing rafters and install new exterior-grade CDX plywood.
- Install Self-Adhering Membrane: Cover the new decking with high-temperature, self-adhering ice and water protector membrane.
- Reset Flashing and Shingles: Install 26-gauge galvanized steel or aluminum flashing, integration-lapped with surrounding underlayment. Lay new color-matched asphalt shingles, securing each tab with four to six corrosion-resistant roofing nails driven below the adhesive sealant strip.
- Framing Drydown: Allow attic rafters and ceiling joists to dry down below 15% WME using commercial air movers and dehumidifiers before reinstalling insulation.
Drywall Patching, Stain Sealing, and Repainting
Restore damaged ceiling drywall using this proven finishing method:
- Cut Away Saturated Drywall: If the drywall is soft, sagging, or mold-contaminated, cut out the damaged section with a jab saw in a clean rectangular shape, stopping at the center of the ceiling joists.
- Install Backing and New Board: Screw 1×3 wood backing cleats along unsupported drywall edges. Fasten a matching thickness piece of drywall (typically 1/2-inch or 5/8-inch) with 1-1/4-inch coarse-thread drywall screws spaced 8 inches apart.
- Mesh and Compound Application: Apply self-adhesive fiberglass mesh tape over all seams. Feather three coats of joint compound across the patch, sanding lightly with 150-grit sandpaper between coats. Match existing ceiling texture using spray knockdown compound.
- Apply Stain-Blocking Primer: Water stains bleed straight through standard latex interior paint. Apply two coats of high-solids, oil-based, or shellac-based stain-blocking primer (such as Zinsser BIN or Kilz Original) over the entire repaired zone.
- Finish Coating: Paint the ceiling with a premium, dead-flat ceiling paint, blending 12 inches past the primed area to eliminate visible sheen transitions.
Frequently Asked Questions About Ceiling Leak Detection
Why is my ceiling leak located far from the actual roof hole?
Water always flows along the path of least mechanical resistance. When rainwater penetrates an exterior roof shingle, it contacts the sloped roof sheathing, rafter tops, or horizontal ceiling joists. Surface tension allows the water droplet to cling to the bottom edge of wood framing members, traveling 10 to 20 feet horizontally before encountering an obstruction, a nail penetration, or a low drywall seam where it finally falls onto the ceiling.
Can high humidity or air conditioning cause ceiling leaks?
Yes. In unconditioned attics during high-humidity periods, uninsulated metal air conditioning ductwork, uninsulated bath exhaust ducts, or clogged condensate drain pans cause moisture issues. When warm, humid attic air contacts cold supply duct metal, it drops below the dew point, producing rapid condensation that pools and drips through the ceiling, mimicking a plumbing or roof leak.
When is a ceiling leak considered a major emergency?
A ceiling leak requires immediate emergency response when drywall visibly sags or bows under accumulated water weight, when water leaks directly through energized light fixtures or ceiling fan housings, when a pressurized plumbing pipe bursts, or when active storm damage compromises roof decking integrity. In these scenarios, structural collapse and fire hazards are imminent.
Conclusion
Locating the true source of a ceiling leak requires a methodical diagnostic approach rather than random exploratory drywall cuts. By understanding water travel physics, analyzing drip timing, and using advanced non-destructive methods like thermal imaging and moisture mapping, you can pinpoint the exact entry point and protect your home’s framing.
Most roof leak repairs cost between $300 and $1,500, but neglecting an active leak can rot roof decking within 60 to 120 days, driving reconstruction costs up to $3,000 to $8,000.
For property owners across Texas, our team at The Roof Guys provides rapid response, non-destructive moisture tracing, and permanent structural repairs backed by our comprehensive 10-year warranty.
Contact our team today to schedule your comprehensive roof leak detection and eliminate hidden water intrusion before minor stains turn into structural repairs.