Emergency Assessment and Costs for House Siding Repairs
Executing urgent house siding repairs requires patching punctures smaller than one inch with exterior-grade compound or unzipping and replacing cracked, warped panels while inspecting and sealing the underlying weather-resistive barrier to prevent water infiltration. Evaluating siding damage begins with identifying whether exterior cladding has suffered cosmetic blemishes, localized impact punctures, or structural substrate failure. High winds, hail impacts, falling tree limbs, and extreme solar heat common across Texas and Oklahoma compromise siding panels in distinct ways. Hail impacts leave fractured vinyl, chipped fiber cement, or deep indentations on metal cladding, while extreme heat softens and warps panels.
Addressing siding issues quickly prevents minor surface flaws from turning into widespread framing decay. When planning your project budget, consider how home size, damage scope, and materials influence overall expenses. Homeowners reviewing comprehensive siding installation plans can evaluate typical cost distributions across different property sizes:
| Property Size | Square Footage | Typical Repair Cost Range | Primary Cost Factors |
|---|---|---|---|
| Small Home | 1,200 – 1,500 sq. ft. | $650 minimum | Isolated panel swaps, minor patching, single-story access |
| Medium Home | 2,000 – 2,500 sq. ft. | $850 – $2,000 | Multi-panel repairs, corner trim work, secondary story staging |
| Large Home | 3,000 – 4,000 sq. ft. | $2,000 – $6,000 | Extensive storm remediation, sheathing repair, elevated scaffolding |
Patching vs. Full Section Replacement
A general rule for siding restoration is the one-inch damage threshold. Holes, cracks, or punctures smaller than one inch in stable vinyl or wood panels can be patched using exterior-grade compounds without compromising structural protection. However, when cracks exceed two inches, sections warp, or rot penetrates deeply into the substrate, panel replacement is necessary.
Patching a severely warped or split panel creates weak seams that fail under heavy rain and thermal expansion cycles. Evaluating crucial siding replacement decision factors ensures you do not waste time on superficial repairs when the cladding material has reached the end of its functional life.
Diagnosing Hidden Moisture Damage During House Siding Repairs
Surface damage often conceals water penetration behind exterior walls. When rain passes through compromised joints or impact fractures, moisture collects against the weather-resistive barrier (WRB) and wooden sheathing.
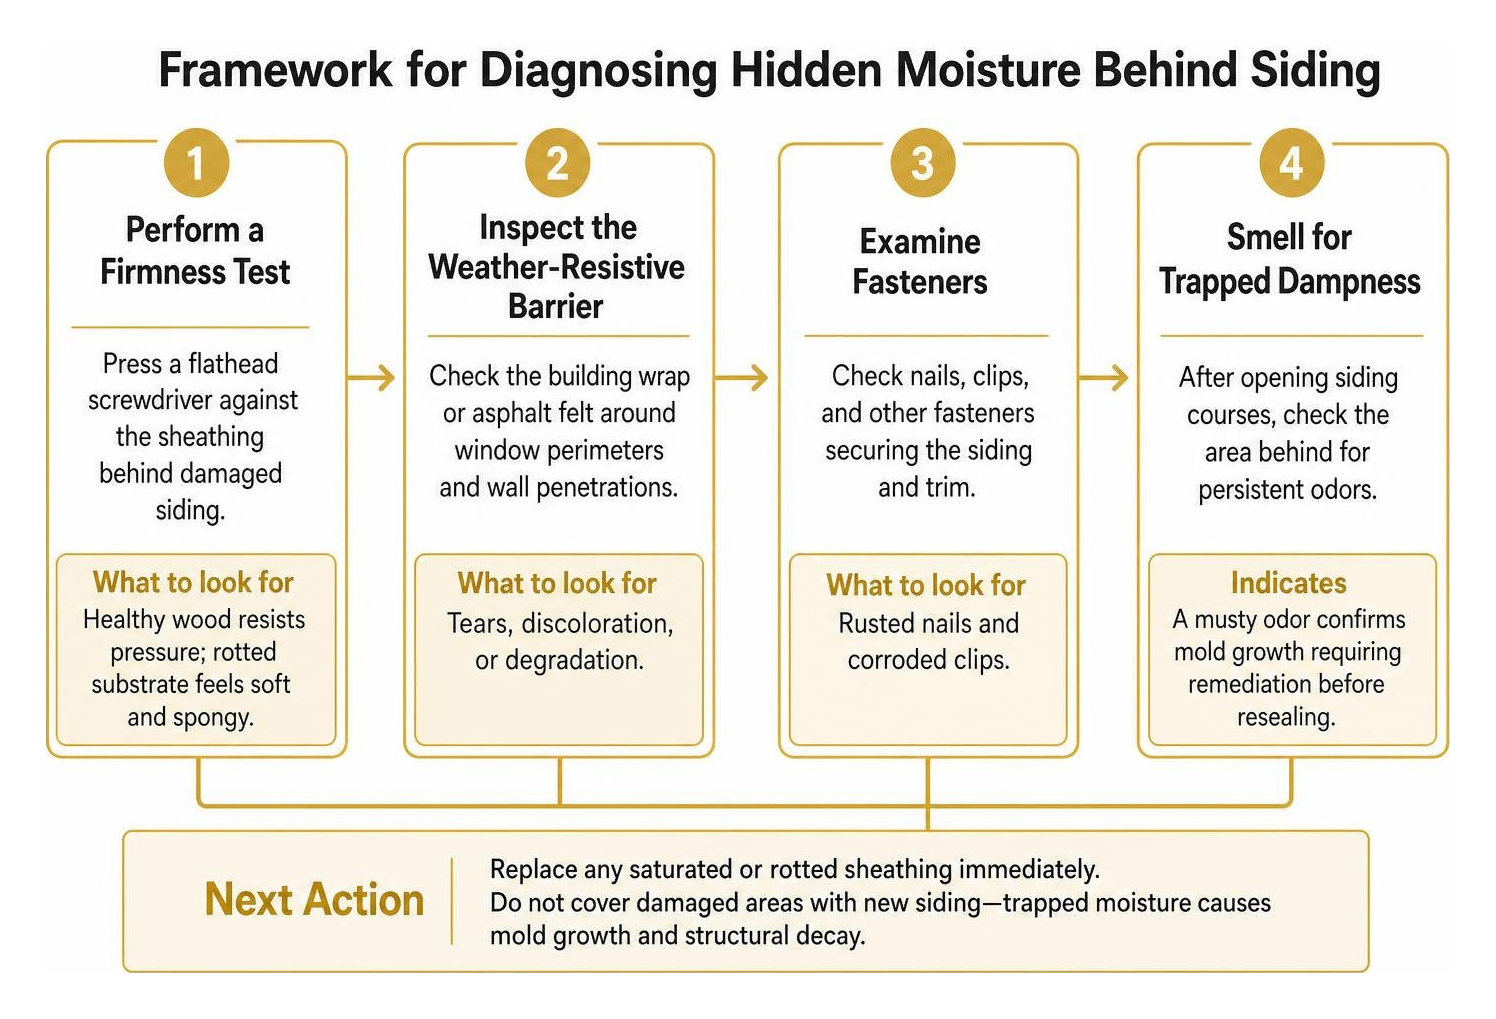
To detect hidden rot before installing new materials, perform these structural diagnostic checks:
- Perform a Firmness Test: Press a flathead screwdriver against the sheathing behind damaged siding; healthy wood resists pressure, while rotted substrate feels soft and spongy.
- Inspect the Weather-Resistive Barrier: Check the building wrap or asphalt felt for tears, discoloration, or degradation around window perimeters and wall penetrations.
- Examine Fasteners: Rusted nails and corroded clips indicate active water pooling within the wall cavity.
- Smell for Trapped Dampness: A persistent musty odor behind opened siding courses confirms mold growth that requires remediation before resealing the exterior.
Detailed guides on How To Repair Water-Damaged Siding emphasize replacing saturated sheathing boards immediately rather than covering them with new siding, which traps moisture inside structural framing.
Step-by-Step Vinyl Siding Fixes and Panel Replacement
Vinyl siding requires specific handling because it expands and contracts significantly with seasonal temperature shifts. In hot climates, restricted panels buckle, warp, or crack under stress. Always wear safety glasses, cut-resistant gloves, and a dust mask when cutting or sanding vinyl materials.
Step-by-Step Vinyl House Siding Repairs for Holes and Cracks
Small holes caused by lawnmowers, stray hail, or fasteners can be permanently repaired using exterior-rated patching compound:
- Smooth the Edges: Use a sharp utility knife to remove jagged edges and loose vinyl fragments around the hole.
- De-gloss the Surface: Lightly scuff the surrounding two inches with 220-grit sandpaper so the patching material bonds securely.
- Clean Thoroughly: Wipe the repair area with a damp microfiber cloth to remove dust, dirt, and chalking residue, then let it dry.
- Insert Backing (For Holes 1–2 Inches): For larger punctures, insert a piece of scrap vinyl or a flexible mesh backer through the hole and secure it behind the panel with exterior construction adhesive.
- Apply Patching Compound: Use a flexible putty knife to apply exterior-grade vinyl filler, overfilling the void slightly to account for minor shrinkage during curing.
- Sand Smooth: Once fully cured (typically 2 to 4 hours), sand the surface flush using 100-grit sandpaper, followed by 220-grit sandpaper for a seamless finish.
- Prime and Paint: Apply an exterior primer, then finish with two coats of vinyl-safe exterior acrylic paint matched to your siding color.
Replacing Damaged Vinyl Panels and Corner Post Trim
When damage exceeds patch limits, replacing the entire panel preserves the wall’s moisture barrier.
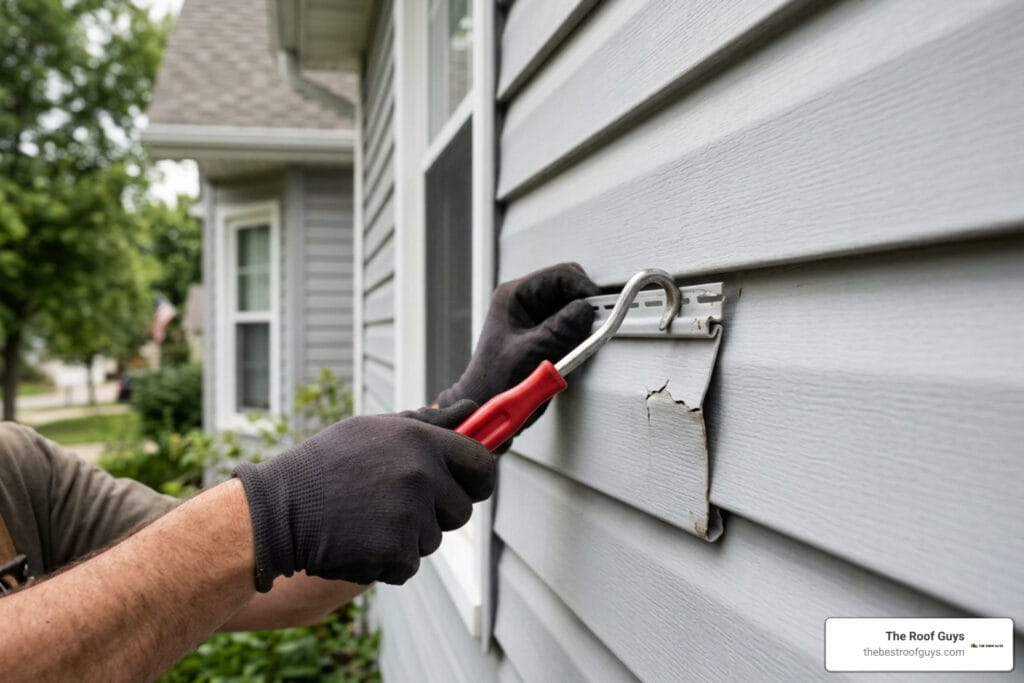
- Unlock the Damaged Course: Slide a siding removal tool (zip tool) under the bottom edge of the panel directly above the damaged piece. Pull downward and slide along the seam to release the locking hem.
- Remove Fasteners: Pry out the roofing nails holding the damaged panel along its top nailing hem using a flat pry bar. Take care not to puncture the building wrap underneath.
- Cut the Replacement Piece: Measure and cut the replacement panel to size using tin snips, leaving a 1/4-inch clearance at trim channels (or 3/8-inch clearance if working in winter) to accommodate thermal movement.
- Hang the New Panel: Hook the bottom lip of the new panel into the lock of the lower course. Fasten galvanized roofing nails every 12 to 16 inches in the center of the pre-punched nailing slots. Leave an 1/32-inch gap between nail heads and the vinyl flange to allow free sliding during temperature shifts.
- Relock the Upper Panel: Use the zip tool to pull the overlapping top panel downward until its bottom lock snaps securely over the new panel’s top lip.
For damaged corner post trim, cut away the torn face channel using an oscillating multi-tool. Trim the nailing flange off a matching corner piece, slip the new profile directly over the existing base, and secure the overlapping face with color-matched pop rivets or exterior adhesive. Exploring durable vinyl siding options provides long-term insight into selecting weather-resilient replacement profiles.
Restoring Water-Damaged Wood, Cedar, and Fiber Cement Siding
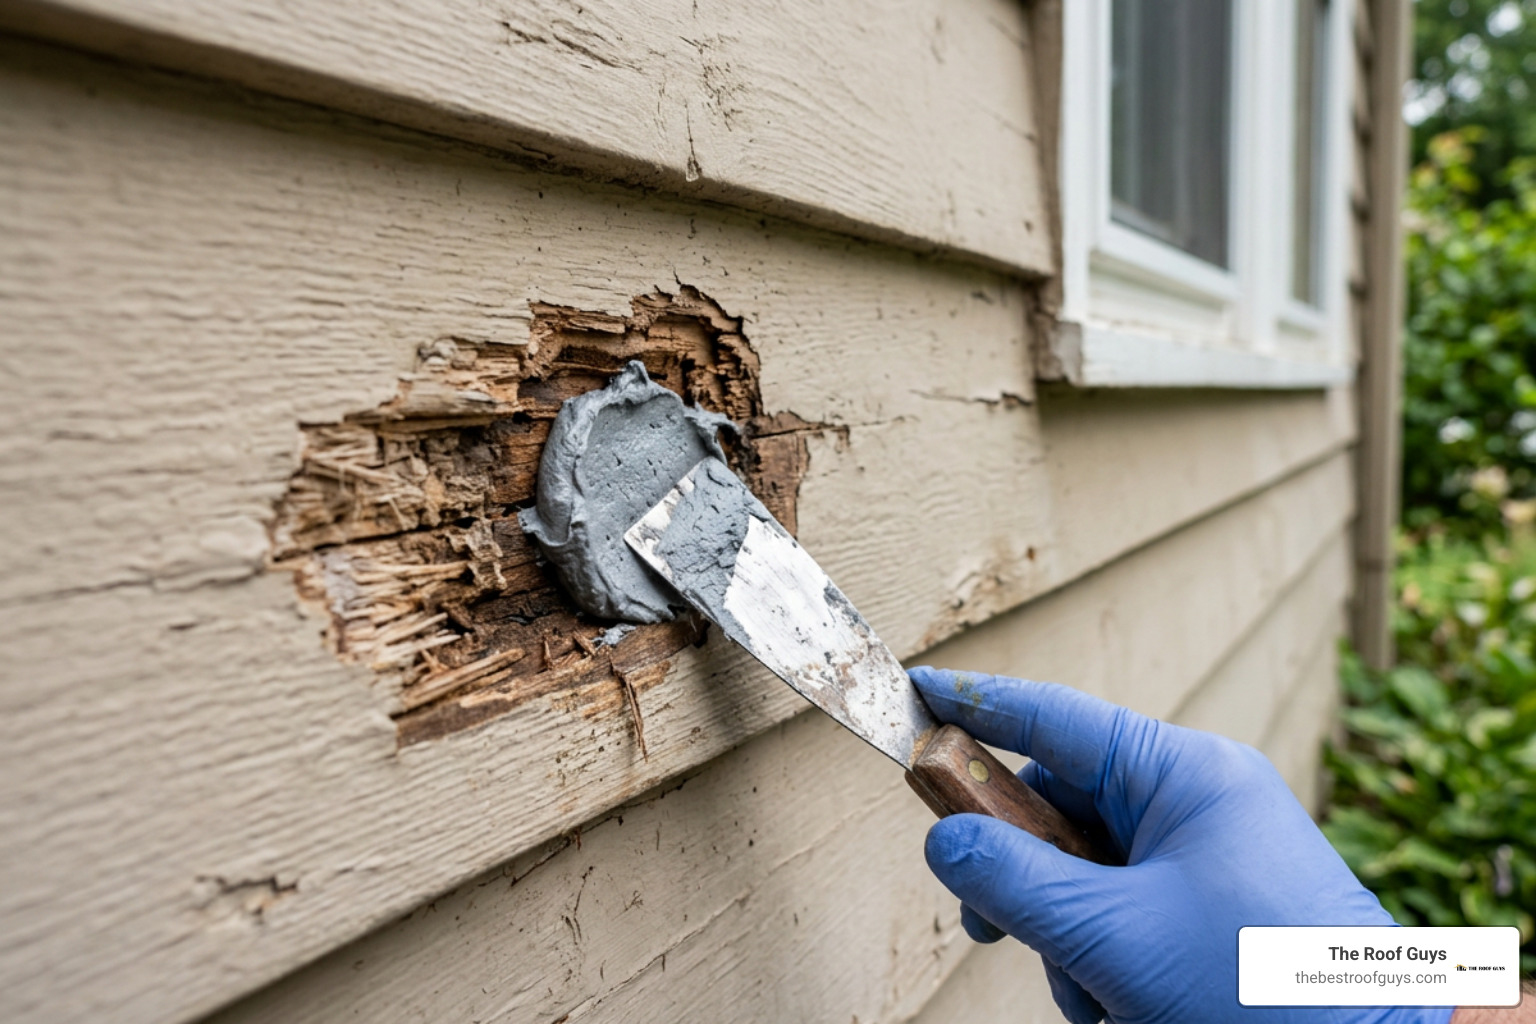
Organic and composite claddings require distinct restoration techniques to prevent biological growth and moisture penetration. Detailed procedures in How to Fix Wood Siding on a House show that proper sealing and edge protection are essential for durable exterior wood repairs.
Wood Siding Rot Repair and Back-Priming Techniques
When wood clapboards or cedar lap boards show soft spots, surface rot, or localized decay, follow this repair sequence:
- Excavate Decayed Wood: Scrape away rotted, spongy fibers down to solid, dry wood using a sharp wood chisel.
- Treat with Hardener: Apply a liquid epoxy wood consolidant to saturate remaining fibers and stop fungal progression.
- Fill and Contour: Press an exterior two-part structural epoxy wood filler into the void with a putty knife, shaping it slightly proud of the wood face. Sand flat after curing.
- Section Replacement: For full-board cuts, set a circular saw depth strictly to the thickness of the board to protect the underlying housewrap. Cut out the rotted section over wall studs.
- Mandatory Back-Priming: Before installation, coat all sides of the replacement wood—including cut ends, face, and back—with high-grade exterior oil or alkyd primer. Unprimed end grain draws water like a bundle of straws, causing premature rot.
- Fastening: Secure boards using hot-dipped galvanized or stainless steel ring-shank nails driven flush with the wood surface. Do not over-drive fastener heads.
Utilizing expert exterior siding repair methods helps maintain structural integrity and preserves natural exterior textures.
Fiber Cement and Engineered Wood Damage Solutions
Fiber cement provides superior resistance to rot, fire, and pests, but chips and cracks can still occur from intense mechanical impacts:
- Patching Minor Chips: Use a specialized cementitious exterior patching compound designed for fiber cement. Clean away dust, wet the area slightly, press the compound in firmly, and smooth flush.
- Fastening Requirements: When installing replacement fiber cement planks, pre-drill holes within one inch of board edges to prevent corner cracking. Use corrosion-resistant fasteners rated for cementitious substrates.
- Flashing at Butt Joints: Place a 3-inch-wide strip of aluminum or composite joint flashing behind every vertical butt joint rather than relying solely on caulk, which breaks down under UV exposure.
Understanding fiber cement siding performance ensures replacement materials handle freeze-thaw cycles and high humidity without delaminating.
Essential Tools, Material Matching, and Finishing Standards

Executing dependable siding repairs requires proper tools and quality materials.
- Essential Hand Tools: Siding zip tool, flat pry bar, 16-ounce claw hammer, utility knife, tin snips, 2-inch flexible putty knife, oscillating tool with carbide blades.
- Safety Gear: ANSI-rated safety glasses, cut-resistant work gloves, N95 dust respirator, heavy-duty extension ladder with standoff stabilizers.
- Bonding & Sealing Materials: High-performance exterior acrylic sealant (30-year rated), exterior polyurethane adhesive, two-part epoxy filler, 220-grit sanding blocks, galvanized ring-shank nails.
When painting repaired panels, take a silver-dollar-sized sample of the existing siding to an exterior coatings retailer for digital color matching.
Important Precaution: Never paint light-colored vinyl siding with a dark paint shade that has a Solar Reflective Index (SRI) lower than the original factory color. Dark coatings absorb excess thermal energy, warping vinyl profiles within weeks of direct sun exposure.
Applying proven weather-resistant siding solutions protects your repair work from intense seasonal storms.
DIY vs. Professional Siding Contractors
While handy homeowners can patch small holes at ground level, complex siding damage requires professional intervention:
- Height and Safety: Working on multi-story exterior walls with ladders carries significant fall risks. Contractors utilize secure scaffolding, lift equipment, and fall-arrest systems.
- Structural Integrity: When moisture penetrates through the sheathing into structural wall studs and headers, licensed professionals safely remove damaged framing members without compromising building loads.
- Warranties and Codes: Certified contractors provide manufacturer-backed material warranties alongside comprehensive labor guarantees.
Homeowners unsure about the structural scope of exterior damage benefit from choosing professional siding repair services to prevent recurring wall issues.
Frequently Asked Questions About Siding Repairs
How long do different siding materials last before needing repair or replacement?
Expected lifespans vary by cladding material and maintenance frequency:
- Standard Vinyl Siding: 20 – 30 years
- Insulated Vinyl Siding: 30 – 40 years
- Wood Siding (Cedar/Pine): 20 – 40 years (requires paint/sealant every 4–7 years)
- Fiber Cement Siding: 30 – 50+ years
- Metal (Steel/Aluminum) Siding: 40+ years
Can you patch a small hole in vinyl siding without replacing the whole panel?
Yes. Holes under one inch across can be sealed using exterior-rated weatherproof vinyl patching compounds. Clean the surrounding vinyl, de-gloss the area with 220-grit sandpaper, apply the compound flush with a putty knife, allow it to cure, sand smooth, and finish with a vinyl-safe exterior acrylic paint.
Why is my replacement wood siding rotting again so quickly?
Wood siding repairs fail prematurely when the cut ends and backside of replacement boards are left unprimed. End-grain wood absorbs moisture through capillary action, trapping dampness behind the siding. Additionally, caulking horizontal bottom lap joints seals in condensation, creating an environment that accelerates rot.
Conclusion
According to exterior cladding field assessments, over 70% of structural wall sheathing rot originates from unsealed siding butt joints, missing step flashing, and delayed repairs of minor surface fractures. Addressing siding cracks and punctures promptly stops water infiltration and preserves your home’s structural framing.
The Roof Guys delivers rapid storm response and durable exterior repairs throughout Texas and Oklahoma. Backed by our 10-year workmanship warranty, our team ensures every repair meets strict weather-resistance standards. For comprehensive inspections and expert service, explore our dedicated professional house siding repair and replacement solutions to protect your property against harsh weather.